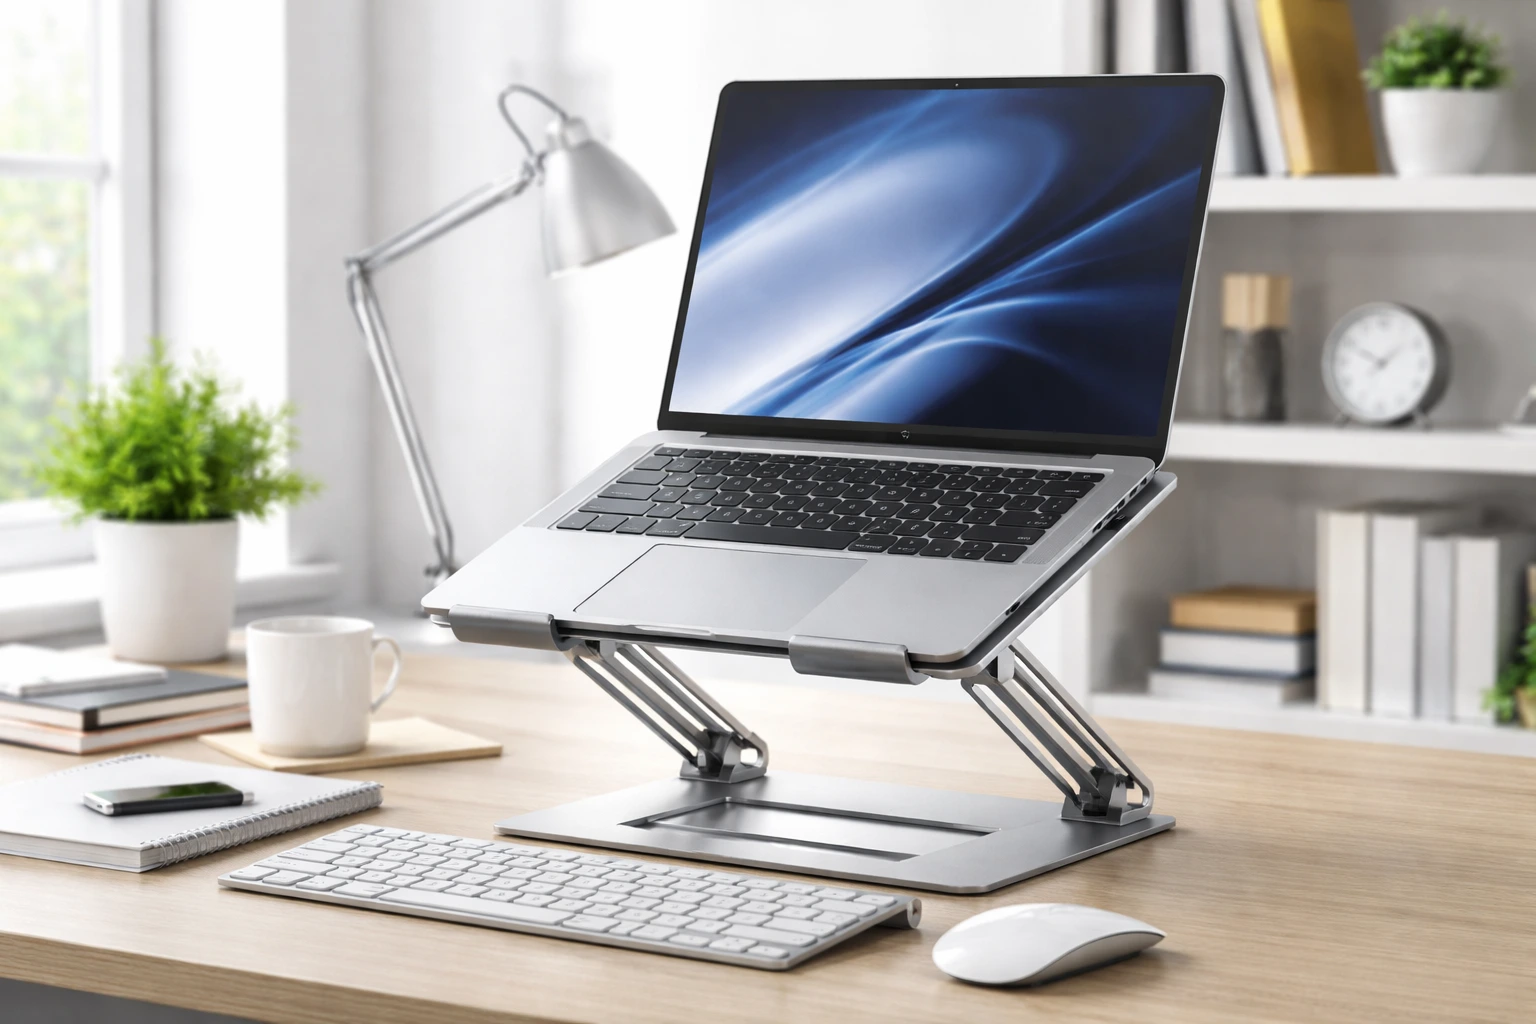
A multi-angle laptop stand is a versatile accessory designed to elevate your computer screen for comfortable viewing and typing positions. By adjusting the angle and height of the screen, these stands promote an ergonomic design that can reduce neck strain and improve posture. Many professionals and students spend hours working on laptops, often leading to hunching over poor setups. A high-quality laptop stand for desk or a standing desk setup can help align the screen to eye level and keep your wrists straight while typing.
Table of Contents
Benefits of a Multi-Angle Laptop Stand
A multi-angle laptop stand provides a range of health and productivity benefits. The primary advantage is improved ergonomics: raising the screen to eye level reduces the forward tilt of the head (often called “tech neck”) and keeps the spine neutral. This correct posture cuts down on neck and shoulder strain, lowering the risk of chronic pain. In fact, studies show well over half of regular laptop users report neck or back discomfort after long hours of work.
Laptop stands also enhance viewing comfort and typing convenience. When the screen is raised and tilted, your eyes look straight ahead rather than down. This reduces eye fatigue and encourages you to sit upright. A better viewing angle often leads to increased focus and productivity. Users who upgrade their setups to include ergonomic stands often note that they can work more efficiently without constantly adjusting their position.
– Reduced neck and back pain: Elevating the laptop encourages a healthier neck posture and less slouching.
– Improved typing angle: Raising the back of the laptop creates a gentler tilt for the keyboard, which can ease wrist strain and improve typing accuracy.
– Better airflow and cooling: Many stands lift the laptop off the desk surface, allowing heat to dissipate and preventing overheating.
– Versatility: A multi-angle stand can be adjusted for sitting or standing setups, making it suitable for various work spaces and tasks.
– Organized workspace: Space is freed up beneath the stand, so you can stash notebooks or external keyboards, keeping your desktop clutter-free.
Ergonomic Design and Posture Improvement
Laptop stands are a key part of an ergonomic workstation. Poor laptop positioning forces users into awkward postures; for example, when the laptop rests flat on a desk, users often tilt their head downward by up to 45°, increasing cervical spine torque. Over time, this can lead to chronic pain and fatigue. A multi-angle laptop stand, however, allows you to align your eyes with the top of the screen, maintaining a neutral head and neck position.
Experts emphasize that keeping your screen at eye level (or slightly below) can alleviate discomfort. One ergonomic study found that using an adjustable stand significantly lowered discomfort scores in neck, shoulder, and arm regions during a typing task. In practical terms, using a stand consistently means sitting upright with a nearly straight back, reducing the muscle load on the neck and preventing the typical forward hunch.
For example, one user noted that switching from a lap setup to a stand eliminated midday neck aches. Simple changes like this — raising the laptop and using an external keyboard — help maintain the ergonomic “90-degree rule” at elbows and neutral wrist position, preventing strains that accumulate over time.
Continual use of an ergonomic laptop stand not only combats tech neck and poor posture but can also increase productivity by enabling longer, more focused work sessions without pain. Studies confirm that consistent ergonomic practices, including screen elevation, often lead to fewer typos, less eye strain, and even improved mood while working. In essence, good posture and comfort make it easier to concentrate on tasks, whether you’re writing reports, coding, or designing.
How to Set Up Your Multi-Angle Stand
Setting up a laptop stand correctly is important for maximizing benefits.
Follow these steps:
1. Screen Height: Position the stand so that the top of your screen is roughly at or just below eye level. This means your gaze naturally falls on the top third of the screen without bending your neck. Tilting your head down about 15°–20° from horizontal is usually comfortable.
2. Viewing Distance: Keep the laptop about an arm’s length away (roughly 20–28 inches). This reduces eye strain and encourages you to sit back with proper spine alignment. Avoid sitting too close or too far, as both can cause discomfort.
3. Angle Adjustment: Tilt the laptop screen to minimize glare and align it perpendicular to your line of sight. Many multi-angle stands allow adjustment in small increments. Adjust until the display is clear without forcing your neck downward.
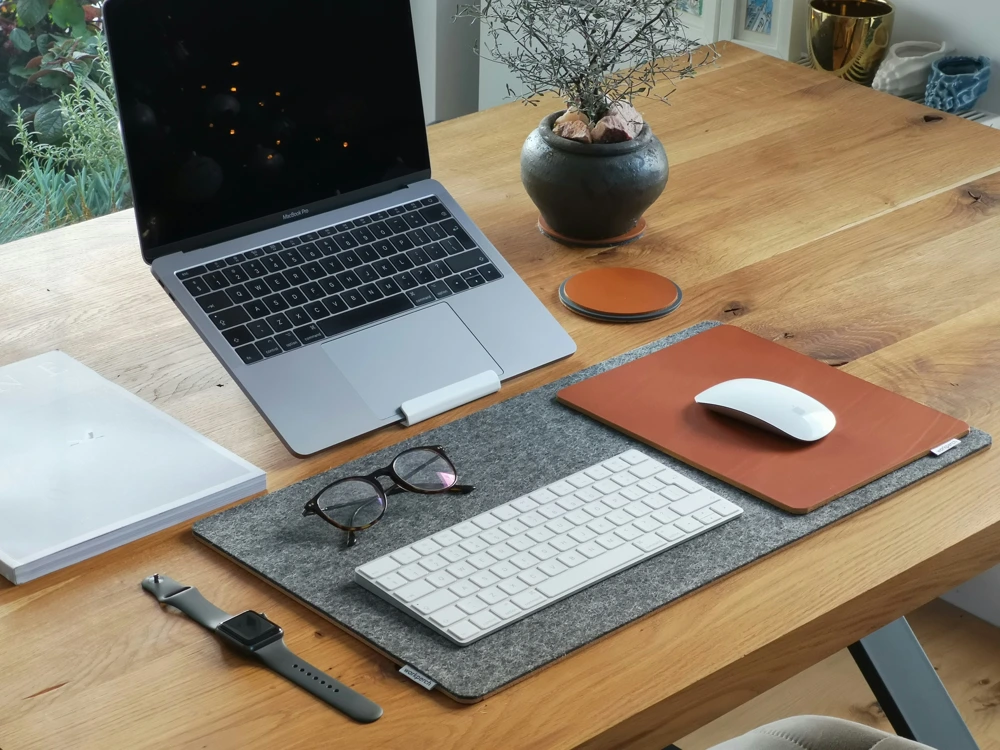
4. Keyboard and Mouse Placement: Place an external keyboard and mouse on your desk. Adjust the laptop stand height so that your elbows are at about 90° when typing. If you can’t get a full 90°, at least try to keep wrists neutral without bending up or down.
5. Posture Check: Make sure your back is supported by the chair, feet flat on the floor. Shoulders should be relaxed, not hunched. The laptop stand is part of the ergonomic setup; a good chair and proper desk height are also important.
Making these adjustments takes a few minutes, but it can greatly reduce the aches and fatigue of a long workday. Users who consistently set up their laptop stands report feeling fewer muscle aches by the end of the day. It also helps to take small breaks (every 30–60 minutes, stand or stretch) to enhance the benefits of your ergonomic workstation.
Adjustable Workspace: Desk and Standing Desk Use
Multi-angle laptop stands shine in their adaptability. Whether you work at a traditional desk or a height-adjustable standing desk, a laptop stand for desk use can be configured to suit your setup. On a desk, the stand brings your screen up to a comfortable height, turning a laptop into a proper desktop workstation. For a standing desk, the stand elevates the laptop to eye level while you stand, ensuring you don’t have to lean over to see the screen. This flexibility supports a dynamic workspace: you can sit for one task and stand for the next by simply adjusting the stand’s angle or height.
Proper positioning on a standing desk helps keep your keyboard at elbow height so your arms remain at a 90-degree angle, which is vital for shoulder and wrist health. Some stands even work as fully portable desk solutions: they collapse for easy storage or travel, so you can use them at home, in the office, or at a coffee shop. In essence, a versatile laptop stand for standing at desk or sitting use acts as a portable workstation riser.
Key Setup Tips:
– If using a laptop stand for desk work, align the screen so your eyes naturally look at the top third of the display. Keep your elbows at 90° with the keyboard at elbow height.
– For standing desk use, set the stand so the laptop screen matches the height of an average monitor you would use while standing. Your wrists should hover in a neutral position as you type.
– Place an external keyboard and mouse on the desk surface so you can type without bending your wrists. This ensures your fingers are positioned correctly while your screen is elevated.
Whether sitting or standing, the goal is the same: keep a neutral spine, relaxed shoulders, and wrists straight. By following these ergonomic principles and adjusting your laptop stand accordingly, you’ll maintain comfort throughout the day.
Portable and DIY Laptop Stands
Not everyone needs a fancy store-bought stand; you can improve your laptop ergonomics with simple DIY solutions or portable risers. If cost or portability is a concern, a do it yourself laptop stand can be a quick fix. For example:
– Stack of Books: Placing firm books or boxes under the back of your laptop can elevate it to a better angle.
– Folded Cardboard or Binder: Sturdy cardboard pieces or thick binders can be folded to prop up a laptop at an incline.
– Lap Desk or Cushions: A small lap desk with built-in incline, or even placing a cushion under the laptop, can raise the device when working on a couch or bed (though a table is still preferable).
These makeshift solutions mimic the function of commercial stands by tilting the screen upward and creating space underneath for airflow. However, for daily office or home use, a purpose-built portable laptop riser is recommended. Many compact stands collapse flat for travel yet unfold into a steady base. Look for adjustable hinges or brackets so you can fine-tune the angle.
Even with a DIY setup, remember the ergonomic principles: your screen should be at eye level and your wrists should be straight when typing. Using an external keyboard and mouse complements both DIY and store-bought stands. In practice, users report that even a simple DIY wedge stand saved them from shoulder pain when working on the sofa or at the dinner table. If you have the time, consider making a wooden or 3D-printed laptop stand to your exact specs – it can be a fun project with a big payoff.
DIY Benefits:
– Low Cost: You can quickly create a functional stand with everyday items.
– Customizable Height: By adding or removing layers (books, binders), you control the tilt angle.
– Portable: Makeshift stands can be as portable as the items you use (e.g., a small stack of books or a foldable clipboard in your bag).
Choosing the Right Laptop Stand
When selecting a multi-angle laptop stand, consider your needs and the stand’s features:
– Adjustability: A good stand should offer multiple angles or heights. Look for stands with sturdy hinges or presets. This lets you fine-tune the angle depending on whether you’re sitting, standing, or working from bed.
– Stability: The stand must securely hold your laptop’s weight without wobbling. Check the maximum screen size or weight capacity (many portable stands handle around 8–10 lbs). Ensure it has non-slip feet or pads to prevent sliding.
– Compatibility: Ensure the stand is sized for your device. Most stands list compatible laptop sizes (e.g. 13–16 inches). Universal stands work well for multiple devices.
– Material and Build: Aluminum or alloy stands are durable and help dissipate heat. Plastic stands are lighter but can flex. Choose a material that balances portability with strength.
– Portability: If you travel or move around often, choose a foldable or telescoping stand. Some models collapse flat or fit in a laptop bag for on-the-go use.
– Additional Features: Some stands have built-in fans or vents to cool your laptop. Others include cable organizers or a surface for a phone or tablet. Ventilated designs improve cooling and make it easy to plug in cords.
Each type has its pros and cons. Foldable Stands are lightweight and travel-friendly but may be less stable. Fixed Risers are rock-solid but bulkier to carry. Adjustable Arm Stands allow premium positioning at any height but tend to be pricey. Reading reviews and checking design photos can help you decide. Ultimately, the right stand is one that keeps your screen at a natural height without compromise.
Frequently Asked Questions
Q: What is a multi-angle laptop stand and why should I use one?
A: A multi-angle laptop stand is an adjustable device that raises and tilts your laptop. It helps you achieve a comfortable viewing angle and ergonomic typing position. By using one, you reduce neck and back strain, improve posture, and make your workspace more efficient. It also frees up desk space and can keep your laptop cooler.
Q: How does a laptop stand help reduce neck strain and improve posture?
A: Without a stand, laptop screens are typically too low, forcing you to hunch over. A stand raises the screen to eye level, which keeps your head upright. This minimizes the forward head tilt (sometimes called “tech neck”) and aligns your spine better. Many users find that raising the laptop screen to the recommended height significantly cuts down on neck and shoulder pain.
Q: Can I use a laptop stand while standing at a desk?
A: Yes! Using a laptop stand on a standing desk setup is very effective. You simply place your laptop on the stand at the correct height so the screen is at eye level when standing. This ensures you maintain good posture even while standing. It’s especially useful because standing desks are usually higher — without a stand, the keyboard would be too low or the screen too far down. With a stand, your display and arms stay aligned as if you were at a seated desk.
Q: How can I make my own DIY laptop stand at home?
A: A do-it-yourself laptop stand can be made from simple items. For example, stacking firm books or using a small box under the laptop’s rear can tilt it upward. A binder or hard piece of cardboard can be folded to create a wedge. The key is to lift the back end of the laptop to raise the screen. Just ensure whatever you use is stable and won’t slip. While DIY stands can work in a pinch, a purpose-built portable laptop riser offers more adjust ability and reliability.
Q: What does HP laptop stand for?
A: In the context of laptops, “HP” stands for Hewlett-Packard, the name of the company. It’s just a brand name; “HP laptop” simply means a laptop made by Hewlett-Packard. It’s not a technical feature of the device.
Q: What does HP stand for in laptops?
A: The letters “HP” on laptops stand for Hewlett-Packard, the technology company. If you see an HP logo on a laptop, it refers to this brand name.
Dos and Don’ts for Laptop Stand Use
Do: Align your screen to eye level, keep elbows at 90°, and position your keyboard and mouse for easy reach. Remember to take regular micro-breaks: stand, stretch, or walk around every 30–60 minutes to avoid stiffness.
Don’t: Avoid hunching your shoulders or tilting the screen at awkward angles. Don’t block the laptop’s vents; heat buildup can damage hardware. Also, don’t rely on the stand alone — adjust your chair and desk height so your feet are flat on the floor and your arms rest comfortably.
Whether your workstation is at home or in an office, these simple practices combined with a multi-angle laptop stand create a healthier work routine. Many users find that once they adopt these habits, they feel more alert and make fewer mistakes (for example, using the correct posture can improve typing accuracy). Remember: a laptop stand is a tool to improve ergonomics, but it works best as part of a complete setup including a good chair and external peripherals.
Trends and Context
In recent years, the rise of remote and hybrid work has made laptop stands more popular than ever. Employers and schools now emphasize ergonomic setups, since many workers and students report wrist and neck pain from prolonged laptop use. Some companies even send laptop stands to employees as part of home-office equipment packages. This reflects a broader trend: investing in ergonomics upfront can reduce downtime and healthcare costs later.
For example, when schools switched to online learning, parents noticed their children slouching over laptops on dining tables. A quick fix was often a foldable laptop stand from the school supply store. Similarly, tech conferences feature ergonomic gear demonstrations, showing that “carrying a laptop stand in your backpack” is becoming just as normal as carrying headphones. As these trends show, whether you’re a student, developer, writer, or designer, a multi-angle laptop stand is a small investment with big returns in comfort and performance. Don’t wait for pain to strike – improving your setup now helps you stay healthier and more productive later.
If you found this guide useful, please share it with your peers or comment below with your experiences. Together, we can spread awareness about good posture and workplace health. For more tips on tech and ergonomics, visit TechUpdateLab.com and subscribe to our newsletter.
For more tech tips and ergonomic guides, subscribe to our newsletter at TechUpdateLab.com or follow us on social media.
Editorial Note: This article is brought to you by the TechUpdateLab editorial team, providing in-depth tech guides and tips.
Author: TechUpdateLab Editorial Team.