Laptop Screen Flickering Fix at Home — DIY Solutions and Tips
A flickering laptop screen is one of those problems that starts as a minor annoyance and quickly becomes unbearable. One minute you’re working normally, the next the display is strobing like a broken fluorescent tube. Before you panic about expensive repairs or a dead laptop, know this: most flickering issues can be fixed at home. This laptop screen flickering fix at home guide walks you through every solution in order — from the 30-second checks to the deeper hardware fixes — so you can get your display stable again without a trip to the repair shop.
Screen flicker has a handful of common causes, and they range from trivially easy to genuinely tricky. The good news is that software causes (wrong refresh rate, bad driver, glitchy app) account for the majority of cases, and those are all fixable with the steps below. Hardware causes (loose cable, failing backlight, dying panel) take more effort but are still often DIY-able. Work through this laptop screen flickering fix at home guide top to bottom, testing after each step. Stop when the flicker stops.
Laptop Screen Flickering Fix at Home: First: Figure Out What Kind of Flicker You Have
Not all flicker is the same, and the pattern tells you a lot about the cause. Take 60 seconds to observe before you start fixing.
Does It Flicker Everywhere or Only in Certain Apps with Laptop Screen Flickering Fix at Home?
Open Task Manager (Ctrl + Shift + Esc on Windows). If Task Manager flickers too, the problem is almost certainly your display driver or the display hardware itself. If Task Manager is rock solid while everything behind it flickers, an application is the culprit — some app is redrawing badly or conflicting with the graphics system. That distinction saves you from chasing the wrong fix for an hour.
This single test eliminates half the possibilities. Driver/hardware flicker means skip the app troubleshooting and go straight to the driver and display sections. App-only flicker means you can ignore hardware entirely and focus on finding the misbehaving program.
Is It Constant or Intermittent with Laptop Screen Flickering Fix at Home?
Constant flicker from boot — visible on the manufacturer logo screen before Windows even loads — points to hardware. The operating system isn’t running yet, so software can’t be blamed. Intermittent flicker that comes and goes, especially when you move the lid or the laptop, screams loose display cable. Flicker that only starts after the laptop warms up suggests a heat-related component issue.
Note when it happens. “Flickers when I tilt the screen” and “flickers after 20 minutes of gaming” lead to completely different fixes. Write down the pattern — you’ll thank yourself later if you end up needing professional help and can describe the symptom precisely.
Laptop Screen Flickering Fix at Home: Quick Checks: The 5-Minute Fixes
Start your laptop screen flickering fix at home here. These take minutes and solve a surprising number of cases.
Laptop Screen Flickering Fix at Home: Check the Refresh Rate
A mismatched refresh rate is the single most common software cause of flicker. If your panel is 60Hz but Windows is trying to drive it at 75Hz (or vice versa), you get flicker, tearing, or both.
On Windows 11: Settings → System → Display → Advanced display. Check the refresh rate dropdown and make sure it matches your panel’s native rate (usually 60Hz, sometimes 120Hz or 144Hz on gaming laptops). If multiple options exist, try each one — set it, wait 10 seconds, see if the flicker changes. On Windows 10: Settings → System → Display → Advanced display settings → Display adapter properties → Monitor tab.
On macOS, refresh rate issues are rare, but you can check under System Settings → Displays. If you’re using an external monitor with a MacBook, try different refresh rates there — external display flicker on Macs is often a cable or adapter issue rather than a setting.
Laptop Screen Flickering Fix at Home: Reseat the Power and Disconnect Peripherals
Unplug everything: external monitors, USB hubs, docking stations, even the charger. Run on battery alone for a few minutes. If the flicker stops, add things back one at a time until it returns. You’ve just identified the trigger.
Docks and adapters are frequent offenders, especially cheap USB-C hubs driving external displays. The power delivery negotiation in those hubs can cause exactly the kind of intermittent flicker that drives people crazy. If a dock is the cause, try a different port on the laptop, a different cable, or — budget allowing — a better dock.
Check for Physical Pressure
Gently flex the screen bezel (the frame around the display) with your thumbs while watching for changes. If pressing a certain spot stops or worsens the flicker, you’ve got a pressure or connection issue in that area — usually the display cable where it routes through the hinge, or a backlight connection. Don’t force anything; you’re diagnosing, not repairing, at this stage.
Similarly, slowly open and close the lid through its range of motion. Flicker that changes with lid angle is the classic symptom of a worn display cable. The cable flexes every time you open the laptop, and after thousands of cycles it can develop an intermittent break. This is fixable (cable replacement), but it confirms you’re in hardware territory.
Software Fixes: Drivers and Settings
If the quick checks didn’t complete your laptop screen flickering fix at home, the next layer is software. Work through these in order.
Update or Roll Back the Display Driver
Display drivers cause more flicker than anything else in software land. A buggy update, a corrupted install, or a driver that’s simply too old for your current OS version can all produce flicker.
First, try updating. On Windows: Device Manager → Display adapters → right-click your GPU → Update driver → Search automatically. But don’t stop there — the manufacturer’s driver is usually better than Microsoft’s generic one. Go to Intel, NVIDIA, or AMD’s site directly and grab the latest driver for your specific GPU. Do a clean install if the option exists (NVIDIA’s installer offers it; for Intel/AMD, use Display Driver Uninstaller for a truly clean slate).
If the flicker started right after a driver update, do the opposite: roll back. Device Manager → Display adapters → right-click → Properties → Driver tab → Roll Back Driver. This is one of the most satisfying fixes in all of tech support — two clicks and the problem that appeared Tuesday vanishes.
For a thorough reset, use Display Driver Uninstaller (DDU). Boot into Safe Mode, run DDU to strip every trace of the old driver, reboot, and install fresh. It takes 15 minutes and eliminates an entire category of “is it the driver?” doubt. If you’ve tried updating and it didn’t help, DDU is the next step before concluding it’s hardware.
Disable Hardware Acceleration in Apps
If Task Manager didn’t flicker (meaning it’s an app problem), the usual suspect is hardware acceleration. Chrome, Edge, Discord, Slack, and many Electron apps use GPU acceleration to render, and when it glitches, you get flicker confined to those windows.
In Chrome/Edge: Settings → System → turn off “Use hardware acceleration when available.” Restart the browser. In Discord: User Settings → Advanced → Hardware Acceleration off. Do the same for any other flickering app that has the setting. If the flicker stops, you’ve found it. You can live without hardware acceleration in these apps — the performance difference is negligible for browsing and chat.
This fix is oddly common after GPU driver updates, because the new driver changes how acceleration behaves and some apps don’t adapt gracefully. If your flicker started after a driver update but rolling back isn’t an option, disabling acceleration app by app is the workaround.
Check for Problematic Windows Updates
Occasionally a Windows update itself introduces flicker — usually through a bundled driver or a change in how the compositor handles rendering. If the flicker started within a day of Patch Tuesday, be suspicious.
Check Settings → Windows Update → Update history. Look for anything display-related around the time symptoms started. You can uninstall a problematic update from the same screen (Uninstall updates at the bottom). It’s a temporary measure — Windows will try to reinstall it — but it confirms the diagnosis and buys you time to find a proper fix.
Adjust the Screen Resolution
Running at a non-native resolution can cause flicker on some panels, especially when combined with display scaling. Set your resolution to the panel’s native resolution (the “Recommended” one in Display settings) and set scaling to 100% temporarily as a test. If the flicker clears, experiment with scaling levels to find one that’s both comfortable and stable.
Deeper Software: BIOS, Power, and Interference
Update the BIOS
It sounds unrelated, but BIOS updates frequently include display firmware fixes — especially for flicker tied to panel power management or refresh rate switching. Check your laptop manufacturer’s support page for your exact model, and see if any BIOS release notes mention display, panel, flicker, or graphics.
BIOS updates carry a small but real risk (don’t do it on low battery, don’t interrupt it), so only do this if the release notes suggest it’s relevant or if you’ve exhausted other options. But when it works, it’s the kind of fix that makes you feel like a wizard — a five-minute update resolving weeks of flicker.
Change the Power Plan
Aggressive power saving can cause flicker by rapidly switching the GPU between power states or dimming the backlight in steps. Switch to the High Performance or Best Performance power plan temporarily. On Windows 11: Settings → System → Power & battery → Power mode → Best performance. If the flicker stops, you’ve found a power management issue.
For a permanent fix without sacrificing battery life, dig into the advanced power settings: disable “adaptive brightness,” set the Intel/AMD graphics power plan to “Maximum Performance” on both battery and plugged in, and turn off panel self-refresh if the option exists. These settings trade a small amount of battery for display stability — usually worth it.
Rule Out Electromagnetic Interference
This sounds like superstition, but it’s real: strong electromagnetic sources near the display cable can induce flicker. Common culprits are phone chargers with bad shielding, desk fans with cheap motors, and fluorescent desk lamps. Move suspects at least a foot away from the laptop and see if anything changes. It’s a five-second test that occasionally solves the “impossible” cases.
Hardware Fixes You Can Do at Home
If software didn’t complete the laptop screen flickering fix at home, you’re likely looking at hardware. Don’t panic — several hardware fixes are genuinely DIY-friendly.
Reseat the Display Cable
The display cable runs from the motherboard, through the hinge, to the back of the panel. If your flicker changes with lid angle, this cable is suspect number one. Reseating it — unplugging and firmly reconnecting both ends — fixes cases where the connector has worked loose without the cable itself being damaged.
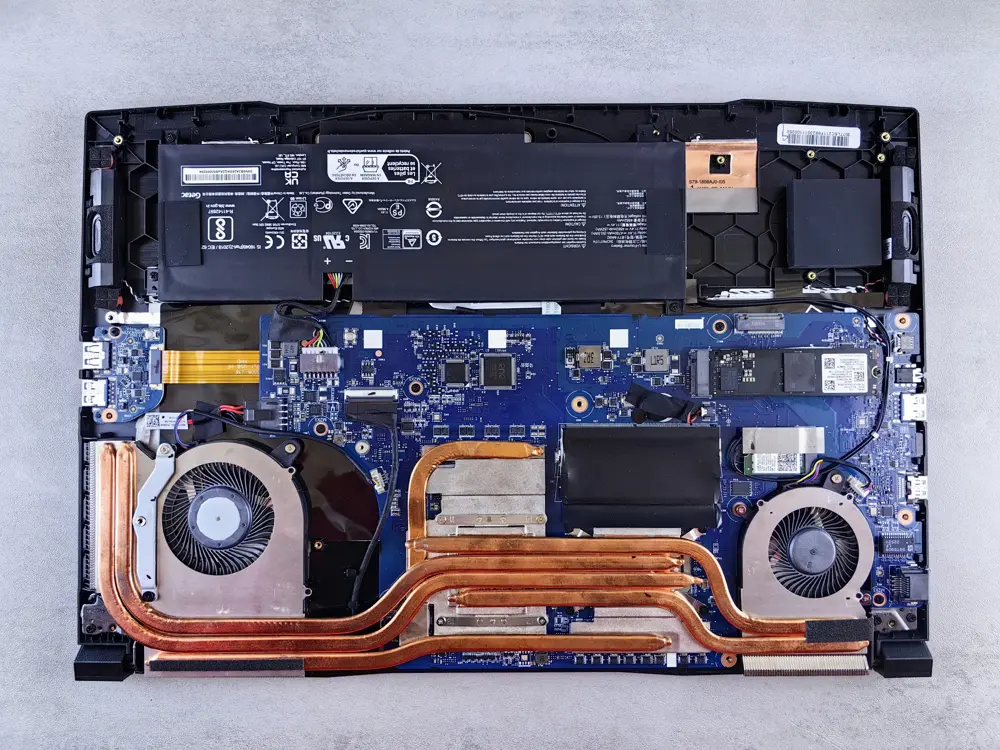
This requires opening the laptop, which varies from trivially easy to genuinely difficult depending on the model. Look up a teardown guide for your exact model on iFixit or YouTube before you start. You’ll typically remove the bottom panel, locate the display connector on the motherboard (it’s the wide flat ribbon cable heading toward the hinge), flip up the locking bar, reseat the cable, and lock it down. While you’re in there, check the cable for visible damage — kinks, nicks, or shiny spots where the insulation has worn.
If the cable is visibly damaged, replacement is the fix. Display cables are model-specific but usually cost $15 to $40 online. It’s a fiddly repair but well within DIY range if you’re comfortable with small connectors. Match the part number exactly — “compatible” cables that aren’t quite right cause their own special headaches.
Check the RAM (Yes, Really)
Bad RAM can cause display artifacts including flicker, because the GPU shares system memory on most laptops (integrated graphics). If you have two RAM sticks, try booting with each one individually. If the flicker disappears with one stick removed, you’ve found a bad module. Replacement RAM is cheap and swapping it takes minutes on laptops with accessible memory slots.
Run Windows Memory Diagnostic (search for it in the Start menu) for a more thorough check. It’s not the fastest tool, but it’s built in and catches the obvious failures. For deeper testing, MemTest86 from a USB drive is the gold standard — let it run overnight if you suspect RAM but the quick tests pass.
Test with an External Monitor
Connect an external display. If the external monitor is perfect while the laptop screen flickers, the problem is isolated to the laptop’s panel, cable, or panel circuitry — the GPU itself is fine. If both flicker identically, the GPU or its driver is the issue, which points back to software or (worse) a failing GPU.
This test is the single most useful hardware diagnostic for display issues. It takes two minutes, requires only a cable and any external screen, and it immediately tells you which half of the system to focus on. Do it before you open anything.
When the Panel Itself Is Dying
Sometimes the answer is the one nobody wants: the LCD panel is failing. Here’s how to tell and what to do about it.
Signs of Panel Failure
Panels usually don’t die suddenly — they degrade. Warning signs include flicker that gradually worsens over weeks, flicker accompanied by discoloration or lines, sections of the screen that flicker while others are fine, and flicker that persists in the BIOS/UEFI setup screen (which rules out all OS-level software). If you’ve done every software fix and reseated the cable and it still flickers, the panel is the remaining suspect.
Replacing the Panel
Panel replacement is the most involved DIY fix here, but it’s very doable — it’s essentially unscrewing the bezel, disconnecting two cables, swapping the panel, and reversing the process. Replacement panels run $50 to $150 depending on the model and specs. The critical step is ordering the exact panel: match the model number on the back of your existing panel, not just the laptop model. Two laptops of the same model can ship with panels from different manufacturers.
Watch a full video teardown for your specific laptop before ordering parts. If the video makes you nervous, that’s useful information — panel replacement is a good repair-shop job, typically $150 to $250 including the part, which is still far cheaper than a new laptop.
Brand-Specific Notes
HP Laptops
HP’s display power management can be aggressive. If you’re getting flicker on battery but not on AC power, check the HP Power Manager or BIOS for display power saving options and disable them. Some HP models also have a known interaction between the ambient light sensor and certain panel firmware — covering the sensor (usually near the webcam) as a test can be revealing.
Dell Laptops
Dell’s PremierColor and Dell Display Manager utilities have caused flicker on several models. If you have them installed, try disabling or uninstalling as a test. Dell also publishes display firmware updates separate from BIOS on some models — check the support page for your Service Tag specifically.
Lenovo ThinkPads
ThinkPads have a BIOS setting for “Graphics Device” (Discrete/Integrated/Hybrid). Flicker that appears after sleep/wake cycles is sometimes fixed by switching this setting. Lenovo Vantage’s automatic driver updates have also been known to install problematic display drivers — if flicker started after a Vantage update, roll back that specific driver.
ASUS Laptops
ASUS gaming laptops with high-refresh panels sometimes flicker when the refresh rate switches dynamically (e.g., 144Hz on AC, 60Hz on battery). Lock the refresh rate in Armoury Crate or the NVIDIA/AMD control panel to eliminate the switching as a variable.
When to Stop DIYing and Get Help
Know your limits. Stop and get professional help if: the flicker is accompanied by burning smells or excessive heat (power issue — unplug it), you see physical damage to the panel (cracks, pressure spots), the laptop is under warranty (opening it may void coverage — check first), or you’ve worked through this entire guide and the flicker persists (you’ve earned the right to hand it off).
When you do seek help, bring notes: when the flicker happens, what you’ve tried, and the results of the Task Manager and external monitor tests. A technician who hears “flickers only when the lid is past 90 degrees, external monitor is fine, reseated the cable already” can go straight to the fix instead of billing you for diagnosis. Your homework saves you money.
Preventing Future Flicker
Once your laptop screen flickering fix at home is complete, keep it fixed. Handle the lid gently — slamming it shut stresses the display cable more than anything else in normal use. Keep drivers updated but wait a week after major GPU driver releases before installing (let others find the bugs). Avoid running the laptop on soft surfaces that block vents; heat shortens the life of every component including the display. And if you use a dock, invest in a decent one — the $20 no-name hub is a false economy when it takes your display down with it.
When you’re getting started with Laptop Screen Flickering Fix at Home, the biggest mistake is trying to do everything at once. The people who get the best results from Laptop Screen Flickering Fix at Home start small, focus on one specific goal, and build from there. Think of Laptop Screen Flickering Fix at Home as a skill you develop over time, not a switch you flip. Each week you spend working with Laptop Screen Flickering Fix at Home, you’ll notice patterns in what works and what doesn’t.
Not every approach to Laptop Screen Flickering Fix at Home is right for every person. Your budget, your experience level, and your end goal all shape which Laptop Screen Flickering Fix at Home strategy makes sense for you. Someone exploring Laptop Screen Flickering Fix at Home for the first time needs different guidance than someone who’s been using Laptop Screen Flickering Fix at Home for months. The advice below assumes you’re past the absolute basics but still figuring out the details.
When you’re getting started with Laptop Screen Flickering Fix at Home, the biggest mistake is trying to do everything at once. The people who get the best results from Laptop Screen Flickering Fix at Home start small, focus on one specific goal, and build from there. Think of Laptop Screen Flickering Fix at Home as a skill you develop over time, not a switch you flip. Each week you spend working with Laptop Screen Flickering Fix at Home, you’ll notice patterns in what works and what doesn’t.
Not every approach to Laptop Screen Flickering Fix at Home is right for every person. Your budget, your experience level, and your end goal all shape which Laptop Screen Flickering Fix at Home strategy makes sense for you. Someone exploring Laptop Screen Flickering Fix at Home for the first time needs different guidance than someone who’s been using Laptop Screen Flickering Fix at Home for months. The advice below assumes you’re past the absolute basics but still figuring out the details.
The Bottom Line
Laptop screen flickering looks scary but is usually fixable at home. Start with the 5-minute checks (refresh rate, peripherals, Task Manager test), work through drivers and settings, and only then consider hardware. Most people will find their fix in the software section — driver issues are that common. For the rest, a reseated cable or a replacement panel is well within DIY range.
The key discipline for any laptop screen flickering fix at home is changing one thing at a time and testing. Shotgun troubleshooting — updating the driver, changing the refresh rate, and reinstalling Windows all at once — leaves you with a fixed laptop and no idea what fixed it, which means no idea what to avoid next time. Be methodical. Your screen (and your sanity) will thank you.